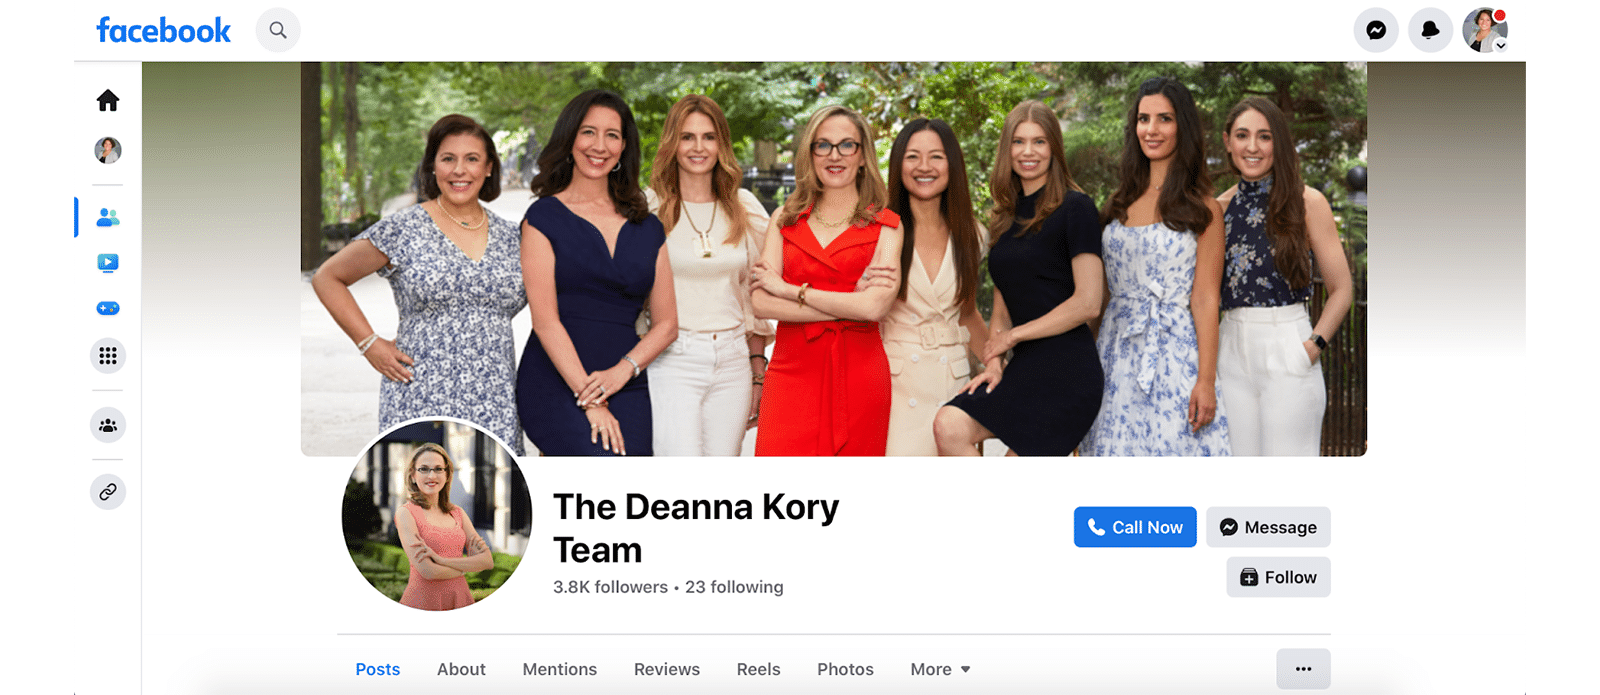
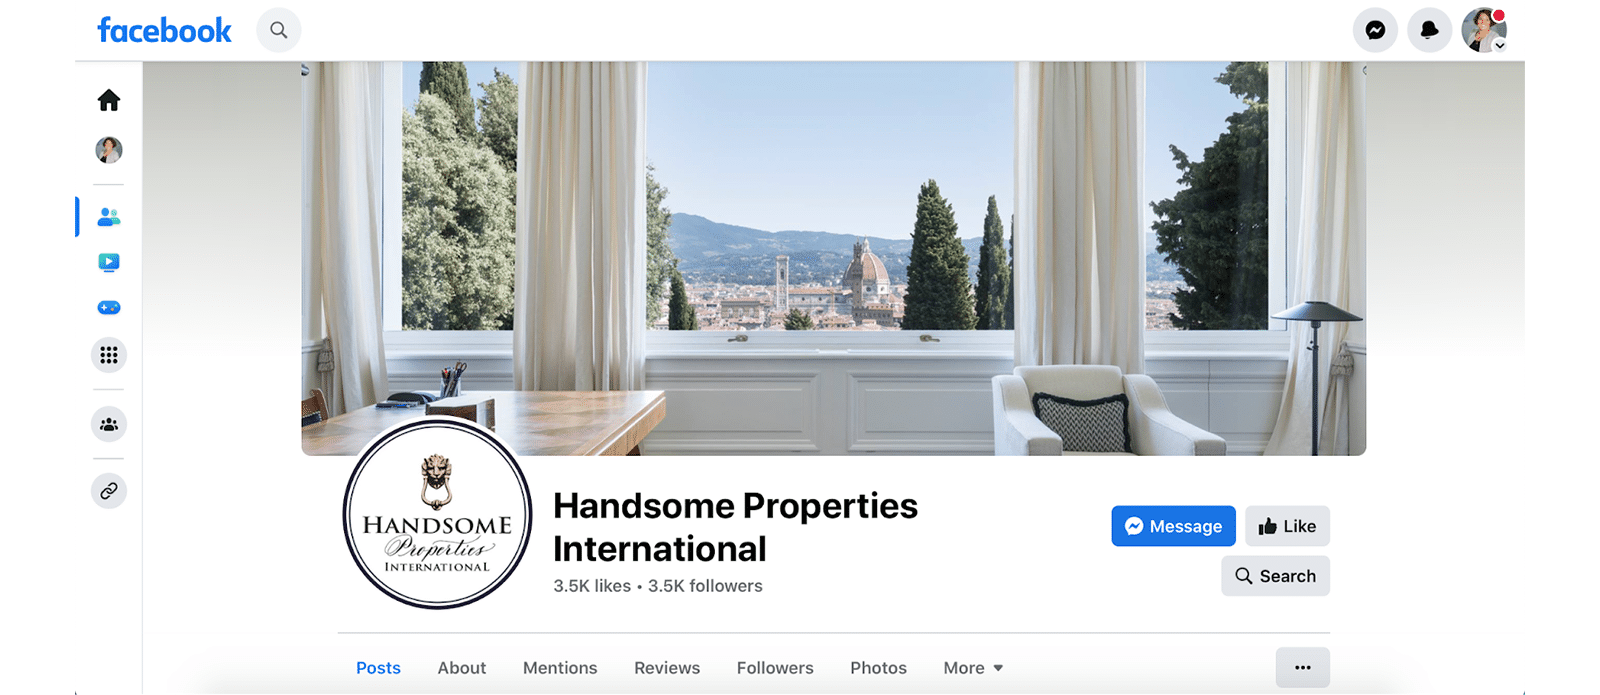
Although we’re clearly in the age of TikTok, your real estate agent Facebook page is still one of the most important elements of your online brand. Especially since one group—millennials—is still the largest share of Facebook users, and they’re the very demographic who are statistically most likely to buy and sell real estate. Throw in the fact that baby boomers also still love their Facebook, and you’ve got a pretty hot spot to prospect.
It’s not difficult to create a real estate agent Facebook page, especially with the help of our step-by-step guide. We’ll walk you through the process and provide expert tips to help you take advantage of everything Facebook (and Meta) have to offer. And you can do it all in an afternoon.
1. Set Up a Meta Business Account
The first step to creating a real estate agent Facebook page is to head to Facebook. You will first need a personal Facebook page, so sign up if you don’t have one already. And yes, you can keep your business page and personal pages separate if you want to.
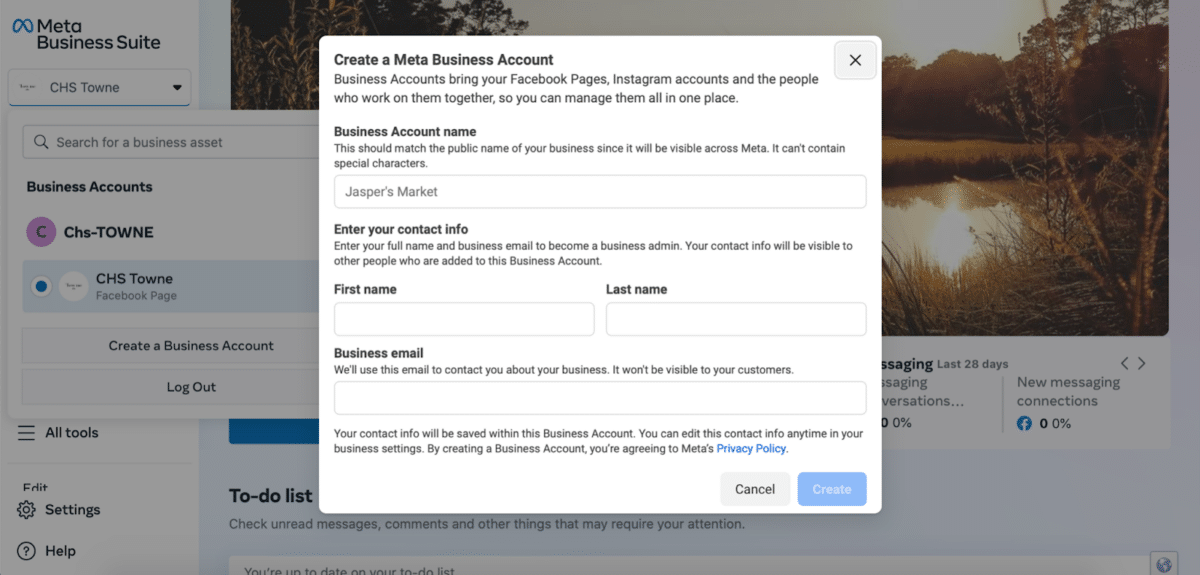
To get started, go to Meta Business Suite and click on Get Started. It’s free, easy, and quick. Add your business name, your name, and email.
2. Add Others
The next step is to add any other stakeholders who will need access to the account. This might be fellow agents or a marketing team.
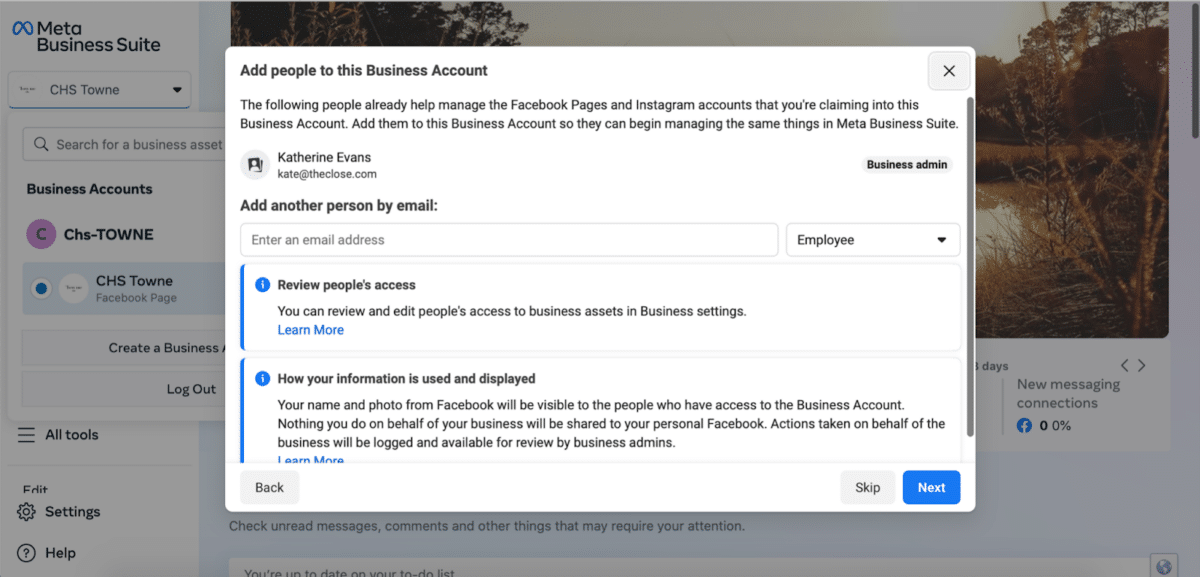
Everything you do in Facebook, from running ads to placing posts to uploading visual content, will all happen here, so make sure everyone who needs to have access has it. You can add people later, but this built-in step makes it easy.
3. Start Building a Business Page
At this point, you have only created a business presence within the Meta Business Suite universe. Now you can start creating your marketing assets within that account.
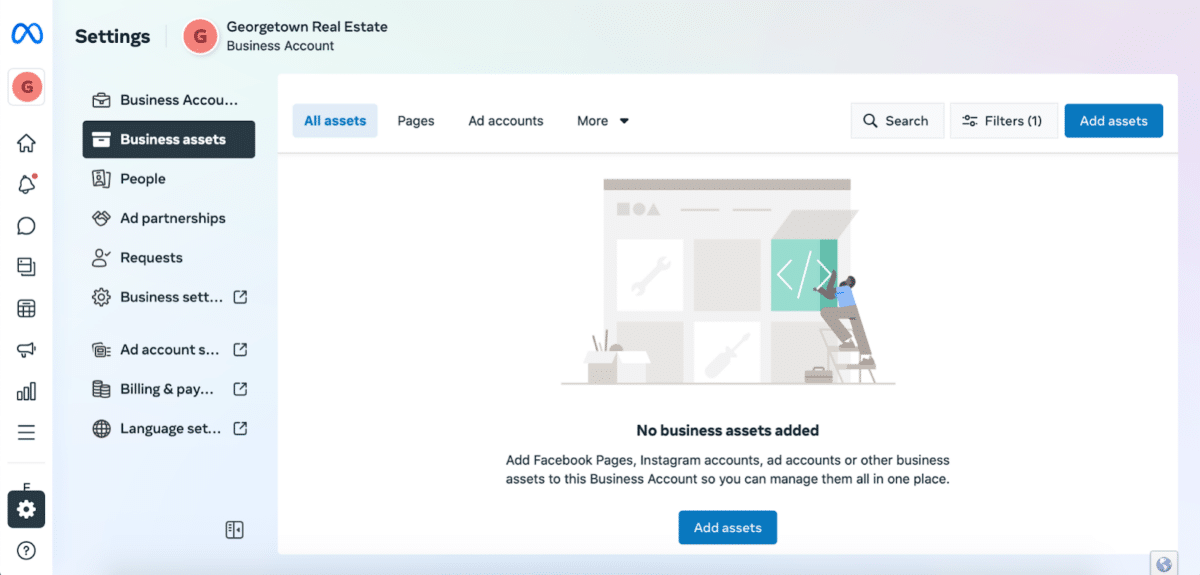
We’re going to focus on the Facebook page, but take some time to explore all of the assets available that can help build your business, remembering that the Meta universe includes Instagram and WhatsApp.
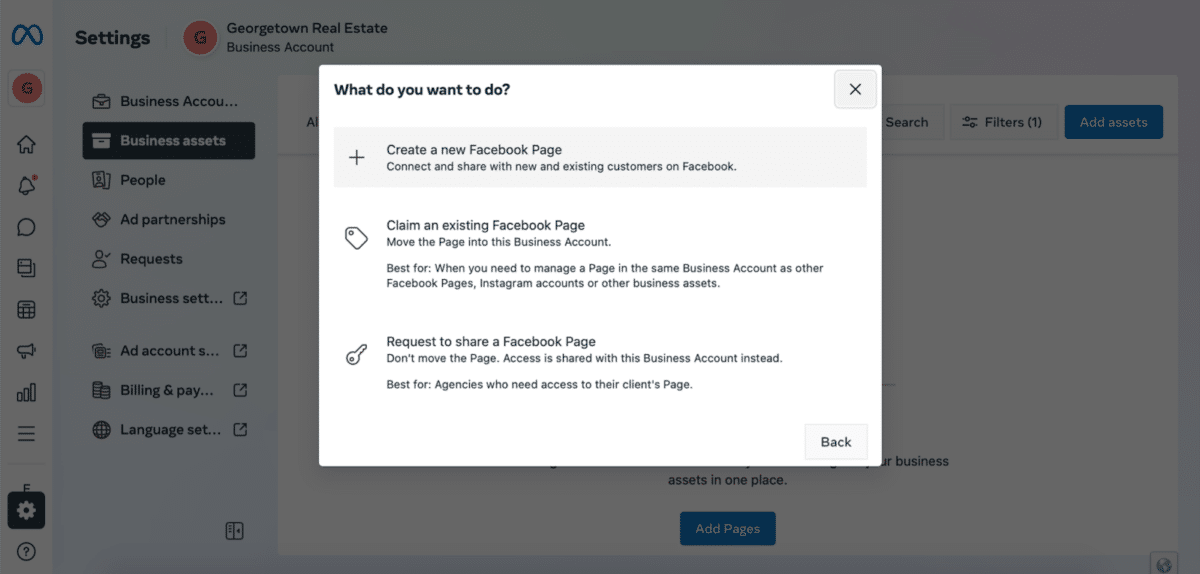
The Basics
For your page name, don’t just use your first and last name. Instead, add something like “Realtor” or “Real Estate Agent.” This helps people differentiate between your personal and business pages. Of course, if you have a team or brand name, you’ll want to use that instead of your name altogether.
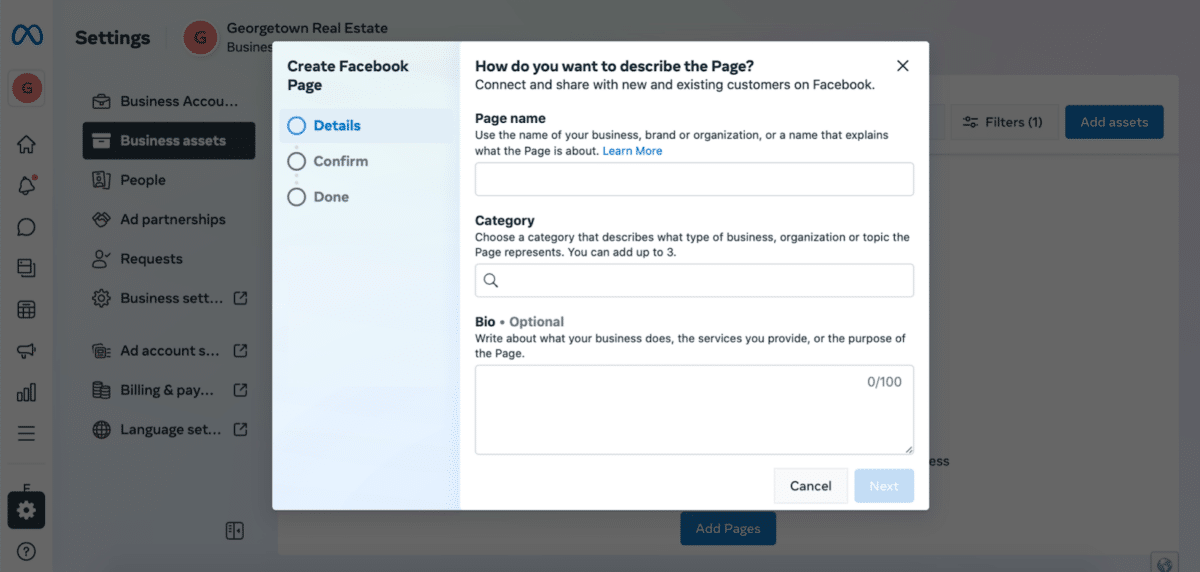
For Category, choose whichever one of these options is most applicable to your business:
- Real Estate Agent
- Real Estate Company
- Commercial Real Estate Agency
- Real Estate Developer
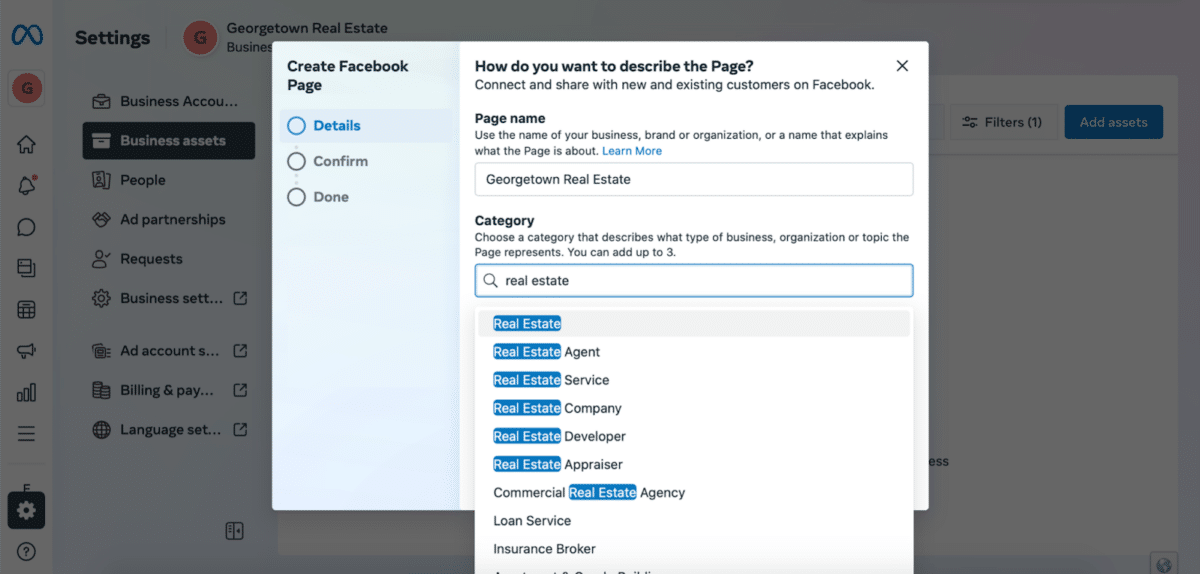
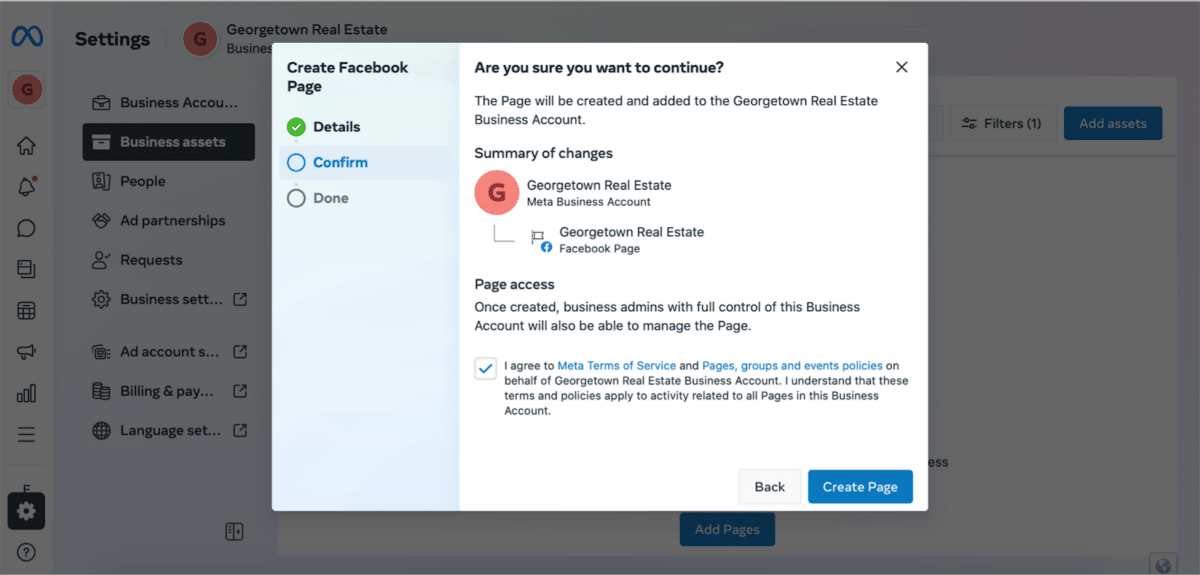
Once you’re done naming your Facebook page and adding a description, click on Create Page. You can then edit your page, add details, and really make it your own.
4. Find Your Page in Meta
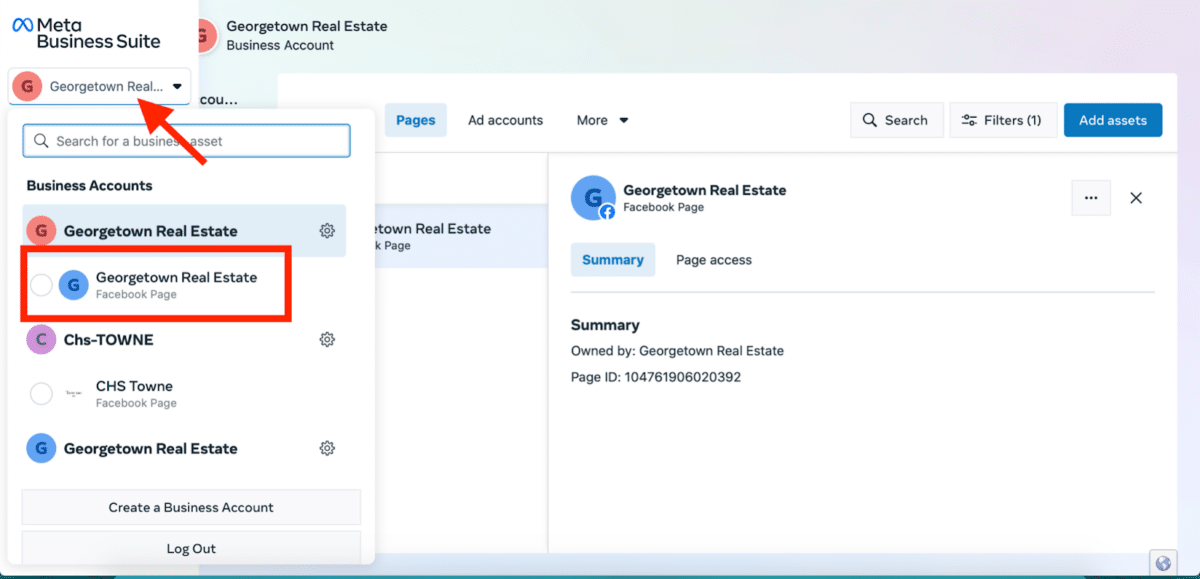
One confusing element for most new-to-Meta folks is the difference between Facebook and the Meta Business Suite. Think of your Facebook page as being nestled under your Meta account.
In Meta, you’ll see some steps to managing your page. We’ll go through the Meta tools in more detail below, but here’s where you can start to play around with the platform.
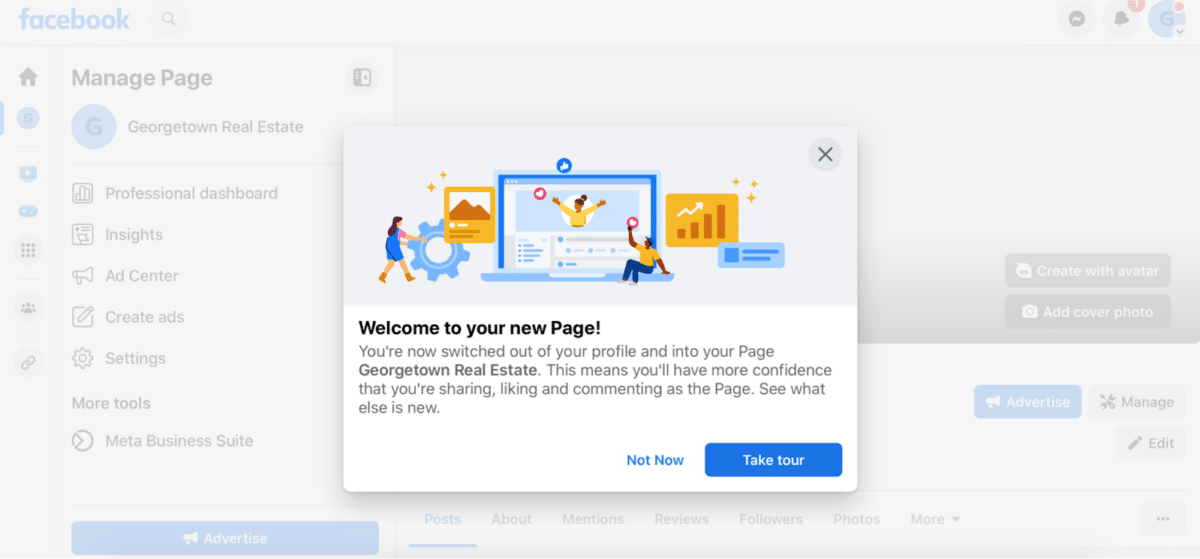
As you can see, Meta is very excited for you and announces your successful page with this helpful, celebratory pop-up. I recommend pausing here to take the tour they offer.
5. Upload Your Visual Assets
Now you’ve built the bare-bones of your real estate agent Facebook page and it’s time to dress it up. You can upload all of your images and video directly to your page and then move them around and crop them right in the platform. Just make sure you have permission to use all the photos you upload to Meta and Facebook.
Cover Image
Let’s first click on the little camera to upload your cover image—that large, rectangular image that sits behind your profile picture. A good cover image is one that’s attractive, complements your profile picture, and, hopefully, says something about what you do.
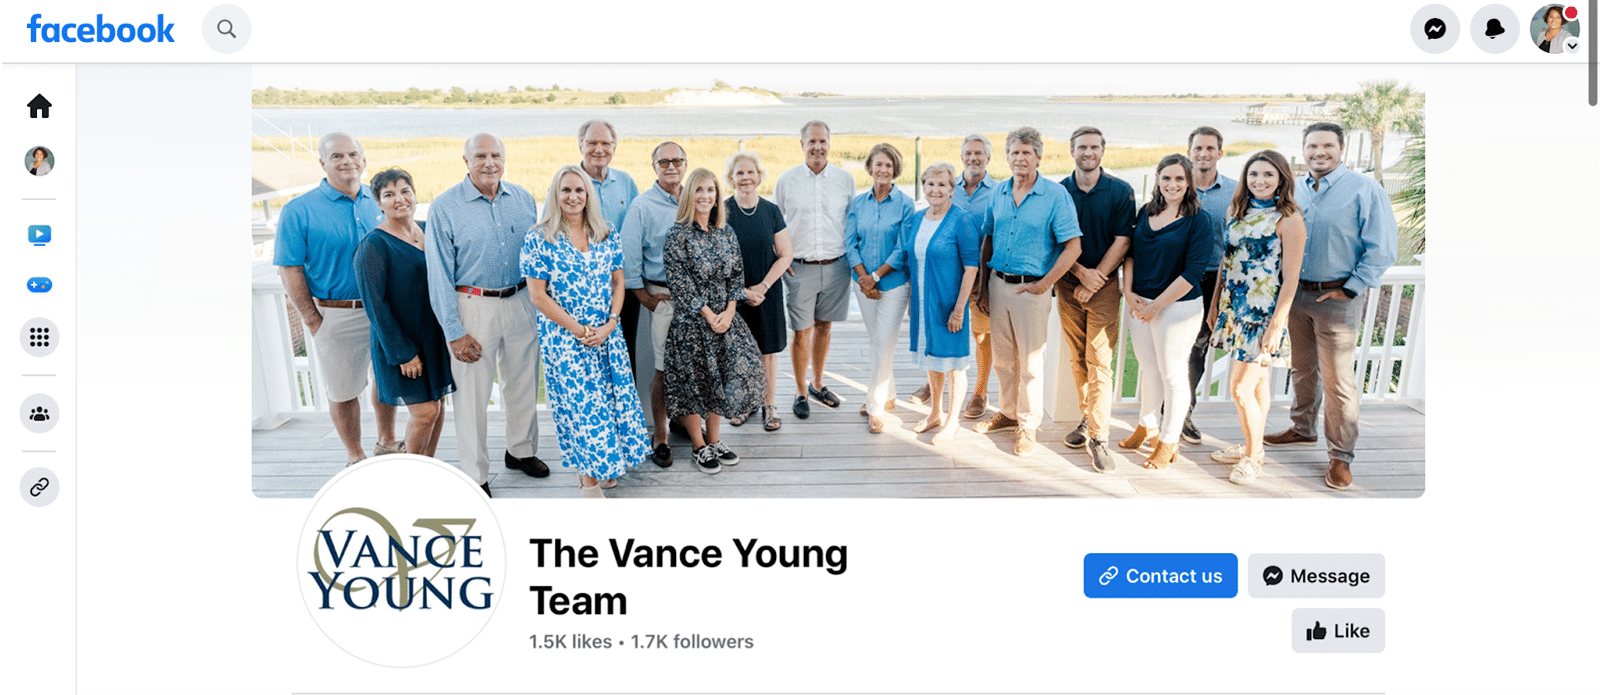
For example, if you’re selling beautiful farm properties in the Carolina Piedmont, pick a pretty landscape photo that shows off the rolling hills. If you’re selling oceanfront in Hawaii, make sure your photo highlights the turquoise waters. This is your opportunity to visually represent your target market. At a loss? A group photo of all your team looking happy and confident is always a strong bet.
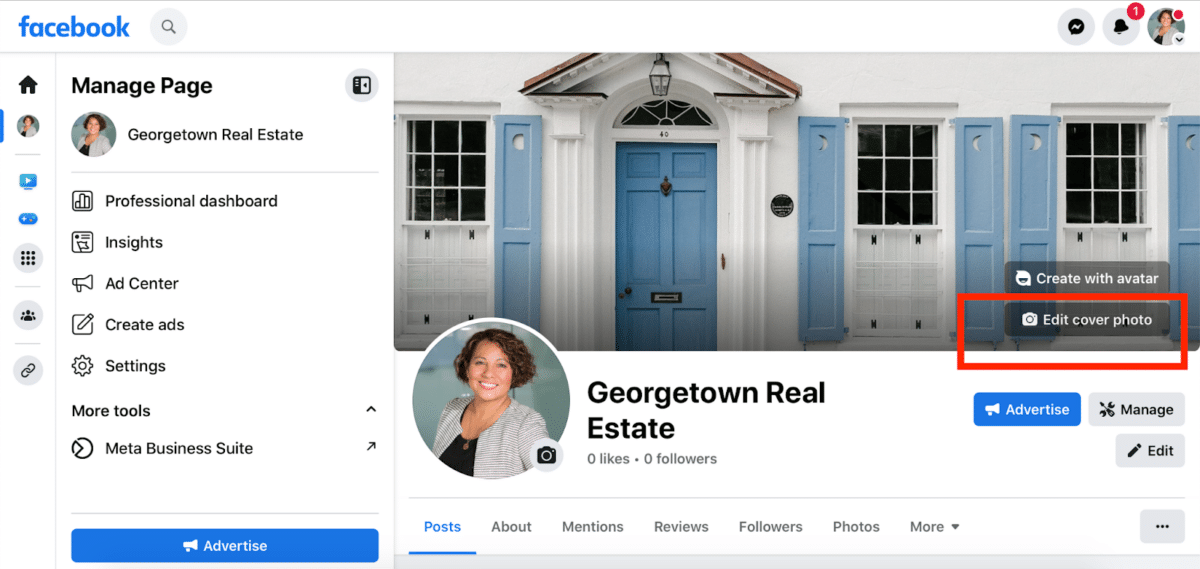
Thankfully, Meta offers detailed information about image specs. Cover images should be at least 400 pixels wide by 150 pixels tall, with a left alignment, full bleed (no margins), and 16:9 aspect ratio. Your profile photo will cover a small half-circle of the image. Facebook recommends using a PNG file. And note that it must be an image—videos aren’t supported as cover images anymore.
Get High-quality Professional Images
If you don’t have the rights to use any high-quality cover images, check out Unsplash. They have 100% free stock photography that is head-and-shoulders above the free offerings on sites like Shutterstock.
11 Awesome Real Estate Facebook Cover Photo Examples to Inspire You (+ Templates)
Adding a Slideshow Cover Image
Not satisfied with a static image as your cover? Slideshows are really easy. Put up to five pictures you like in a folder on your computer and click on the little camera icon in the corner of your cover image. Next, upload your pictures in the order you want them on your Facebook page. You can move them around if you change your mind on the order.
Choose that first image wisely. Unfortunately, Facebook doesn’t scroll through your cover images automatically when a user visits your page, as the name “slideshow” suggests. Instead, users will have to click on the left or right arrows to look at your series of photos.
Adding Text or Your Logo to Your Cover Image
You can also add text or a logo to your cover image. Facebook will cut 90 pixels off the left and right side of your cover image on mobile, so make sure your text is centered and not too close to the side edges.
In terms of design, you have a few options. First, you can try your hand on a design app like Canva, or you can head over to Fiverr and hire someone to create a professional cover image for you (starting at just $5).
Canva Real Estate Features for Agents: The Ultimate Guide
Profile Image
You can use any picture that you’d like for your profile image, but I always strongly suggest agents use a headshot that makes them look trustworthy, competent, and confident―in that order.
13 Tips for Creative Real Estate Headshots (+ Examples)
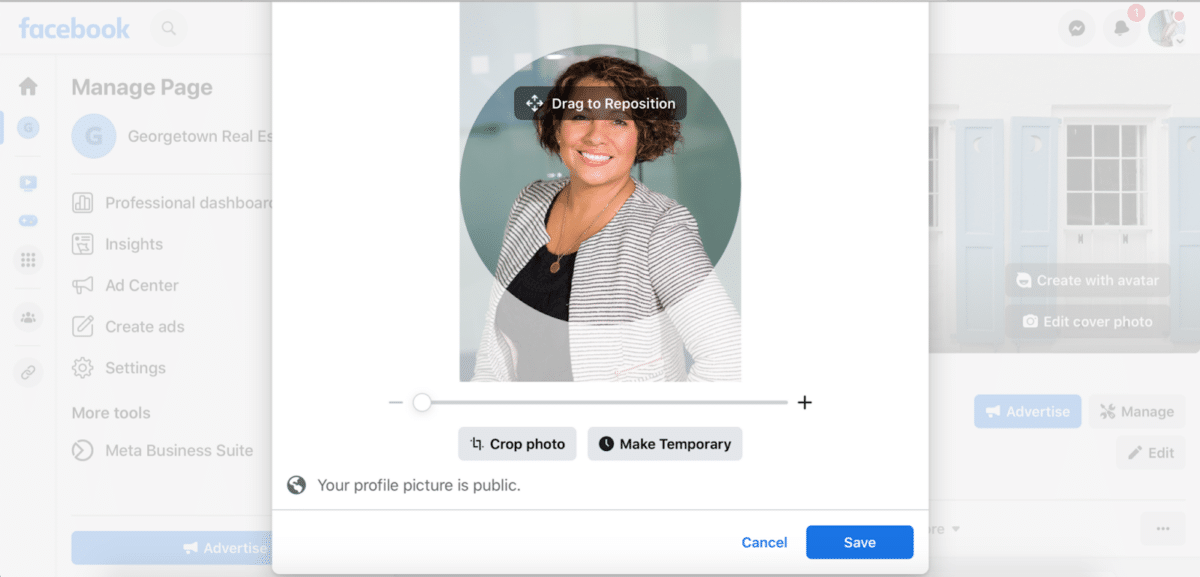
Again, you should reference Meta’s image specs for Facebook. As far as dimensions go, don’t worry too much about making it “high-res,” but note that it will be 176 pixels by 176 pixels on desktop and 196 by 196 on mobile. Your head should be centered properly—and note that the image is cropped to a circle.
6. Set Up Your Systems
Before you even think about advertising on Facebook to drive leads to landing pages on your website, you need to make sure your real estate website is ready to convert them. This might sound obvious, but you would be surprised at how many agents skip this crucial step.
Take some time to plan how to integrate your Facebook leads, customer relationship manager (CRM), and website. If these important lead generation and nurturing tools aren’t talking to each other, then creating your real estate agent Facebook page is a lot of wasted effort.
If you use an all-in-one platform like Real Geeks, you can have professionals help you every step of the way. Real Geeks will run your Facebook ads for you, set up your landing pages, and quickly and easily nurture them with their built-in CRM and marketing tools.
7. Create an @Username
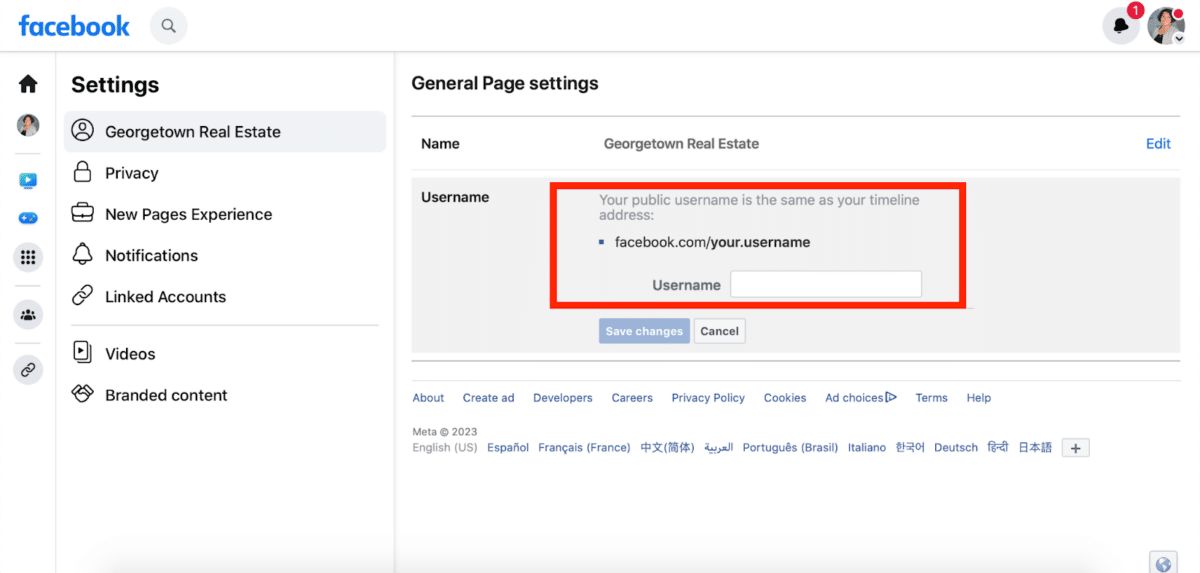
Now that you have your Facebook page mostly built, it’s time to give it a username. Your @username also populates your Facebook URL when it’s shared, which means the example I created here will look like this: facebook.com/GeorgetownRealEstate.
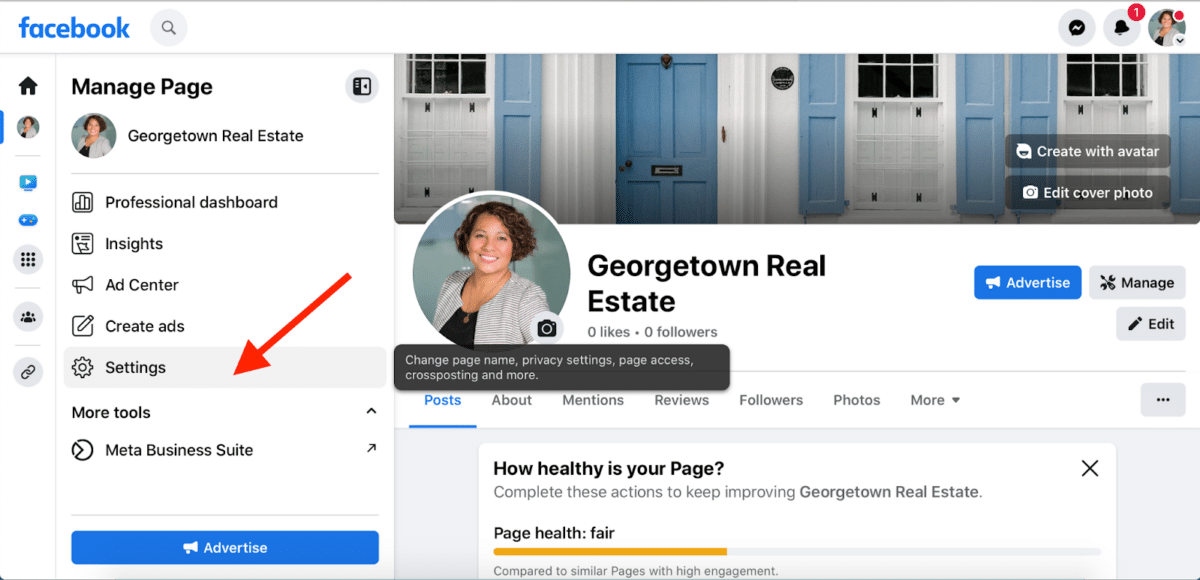
Click on Settings and navigate to General Page settings. Come up with something easy to remember that also says something about your business. Some agents just use their full business name, while others get a bit more creative with their Facebook page handle.
8. Set Up a Facebook Messenger Auto-reply
People are on Facebook at all hours of the night and day. Don’t let that lead who’s interested in your new listing slip away when you don’t get back to them right away. Set up automations so that your page is always working, even if you’re sleeping.
On your Meta dashboard, click on the text bubble icon on the left, known as the Inbox. Then navigate to Automations. Here is where you can set your auto-replies and responses.
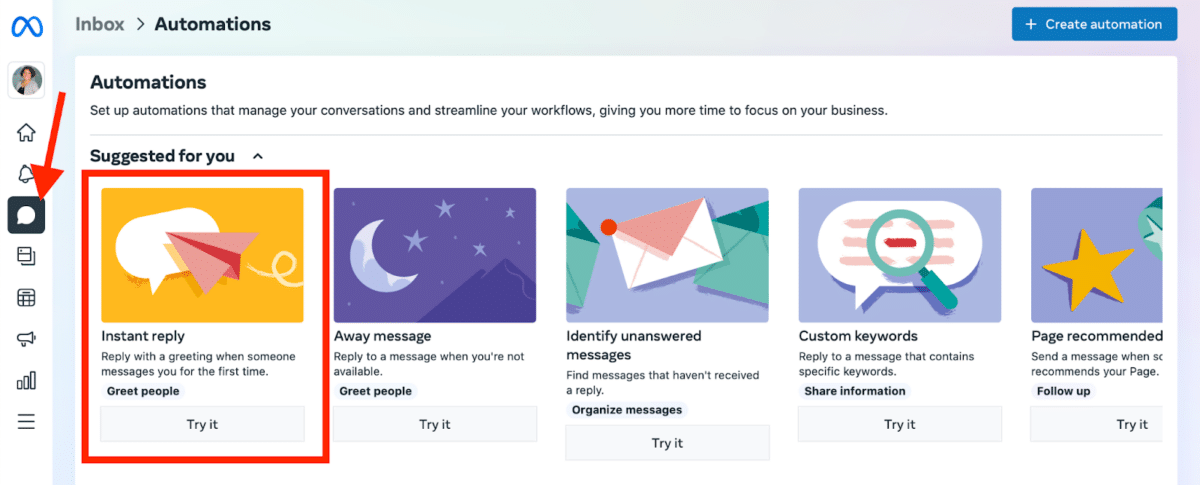
Facebook Messenger can be a powerful tool for lead capture. You can set up automated messages and even program simple (or complicated) chatbots to engage with your visitors’ commonly asked questions.
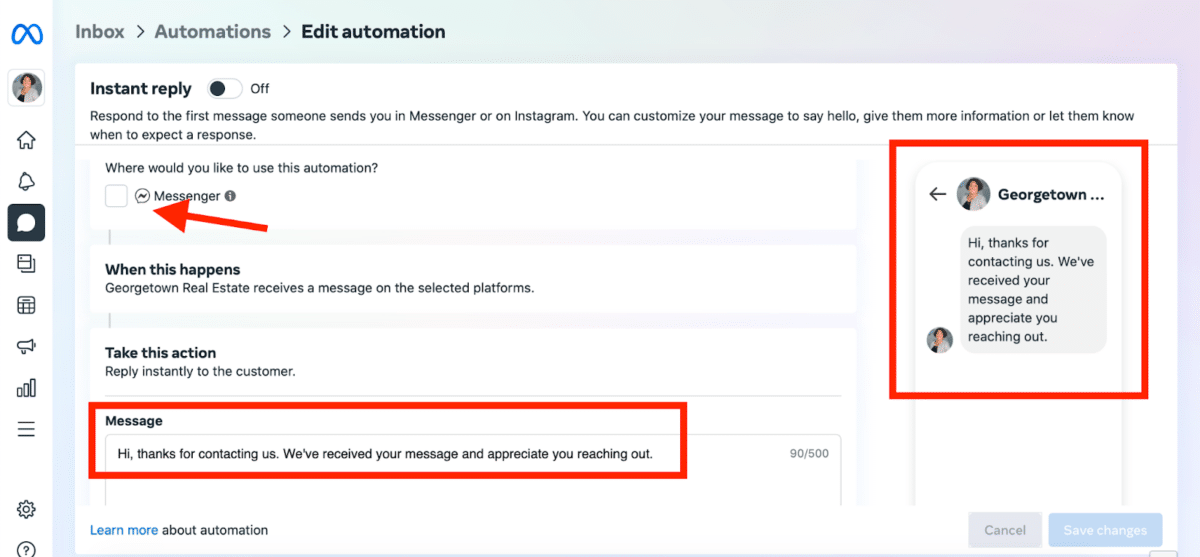
To set an auto-responder, write your reply message in the box. You’ll see a preview of what your message will look like on mobile to the right.
9. Set Notifications to Push
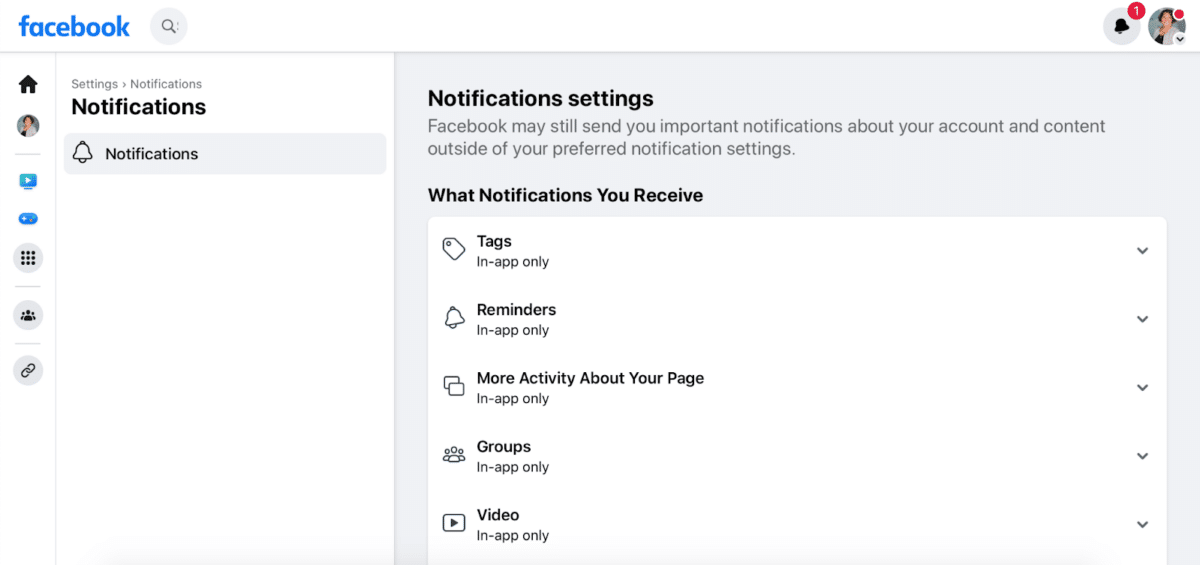
Consumers expect instant responses on social media platforms like Facebook, so you should sign up to get notified as soon as someone “likes” your page, comments on a post, or reaches out to you with a question. Make sure your notifications are set on this page, accessible by clicking on the bell icon in the settings menu:
10. Manage the Health of Your Business Page
The Meta Business Suite has made it easier than ever to manage the health and success of your real estate agent Facebook business page. Here are some of the features to help you optimize your page for lead generation, brand awareness, marketing events, property listings, and more.
Check-ups
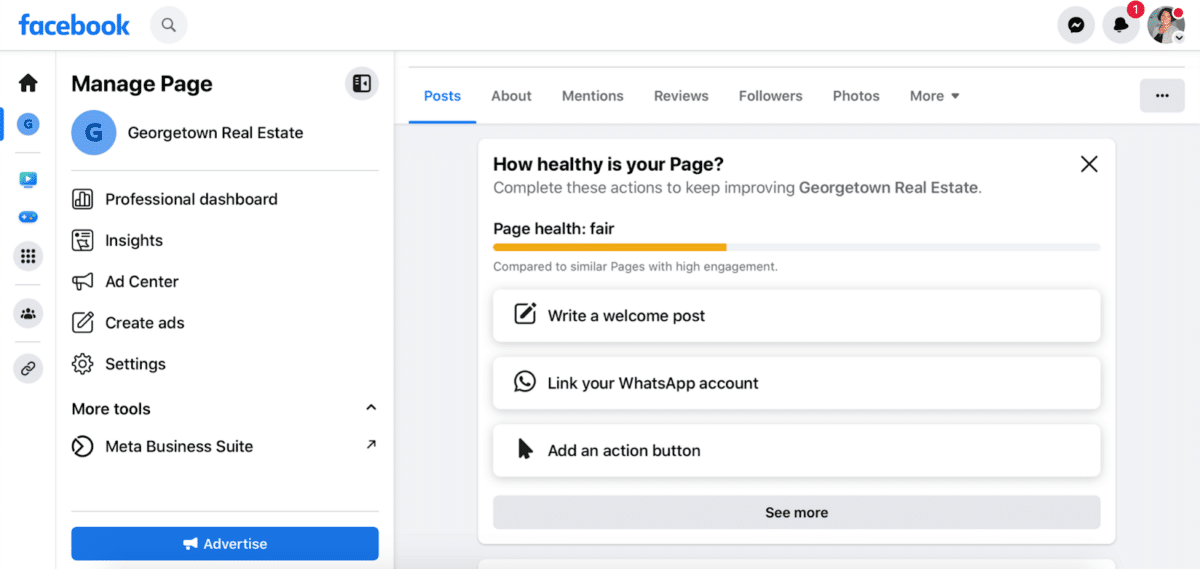
It’s easy to monitor your page’s health and to take steps that make your page even more visible and dynamic. The core dashboard shows you how well you’re doing and, more importantly, where you can add value.
Use Meta for Posts & Ads
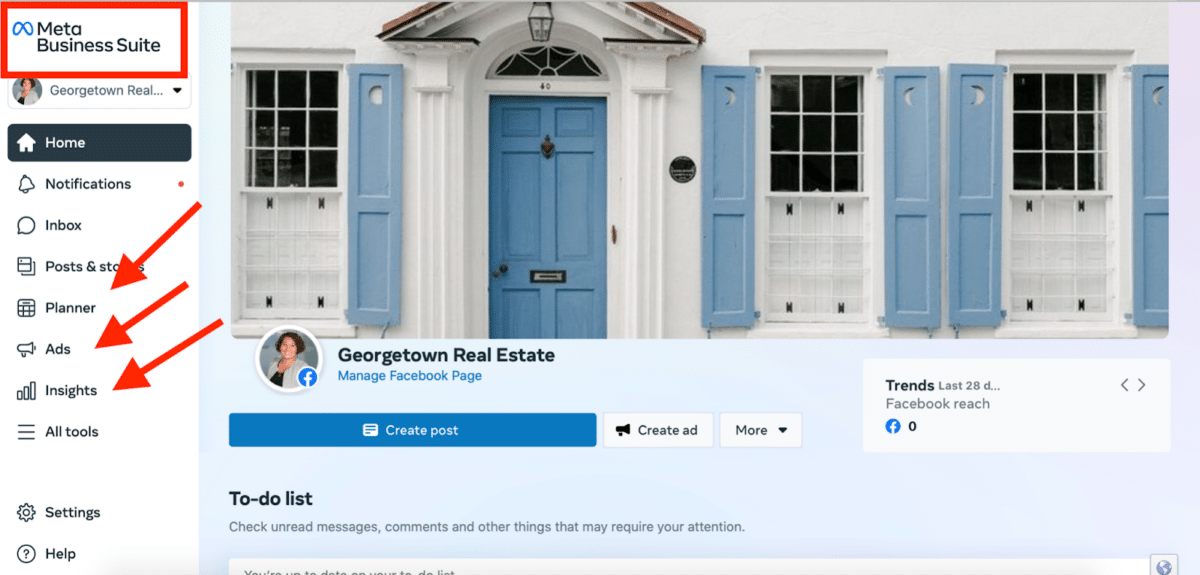
Meta has tools for posting ads, planning out content publication, and monitoring and evaluating your success. Remember you can also easily post within Meta’s other platform, Instagram, all from your Meta Business Suite dashboard.
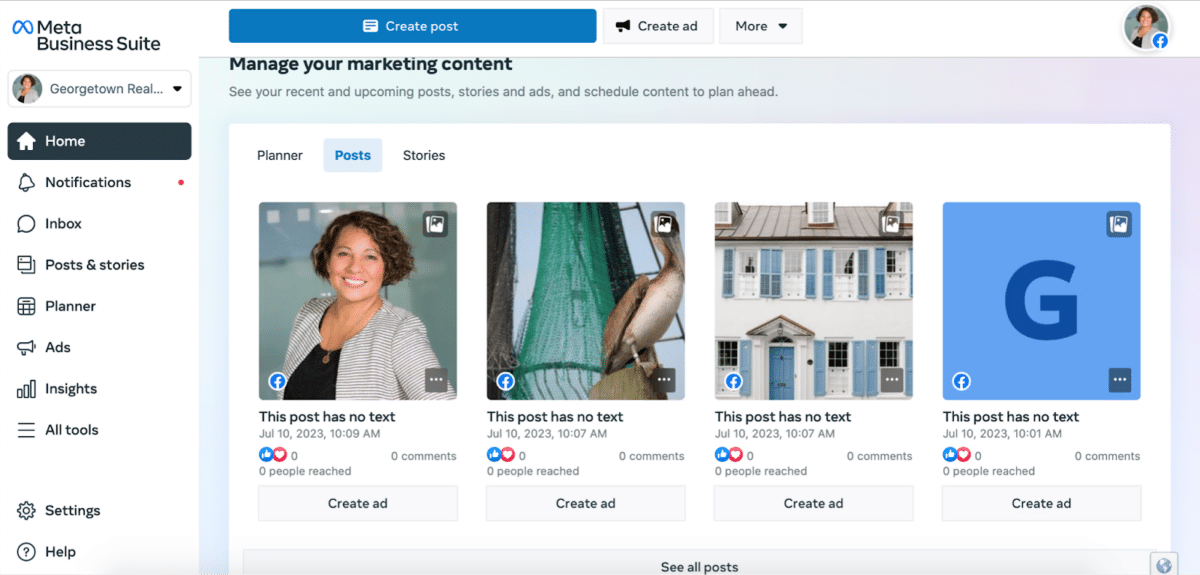
Not sure where to start with ads? We put together a guide that shows you step-by-step how to create your ads and creative ways to engage with your audience.
Want to start getting affordable leads from Facebook ads right away? Try Market Leader’s new Network Boost program. Network Boost does all the hard work of Facebook advertising for you. Once you start getting leads, Network Boost even has automated lead nurturing tools so you only need to step in when they’re ready to tour homes.
Even better, leads from Network Boost are very affordable. It’s $399 per month for an average of 25 leads per month. The price includes the Market Leader Professional software system, which is required for agents who want to use Network Boost leads.
Monitor Your Success
Since you’ve spent all of this time and effort building your real estate agent Facebook business page, you want to make sure it’s working. The Professional Dashboard gives you real-time numbers to see your reach and engagement.
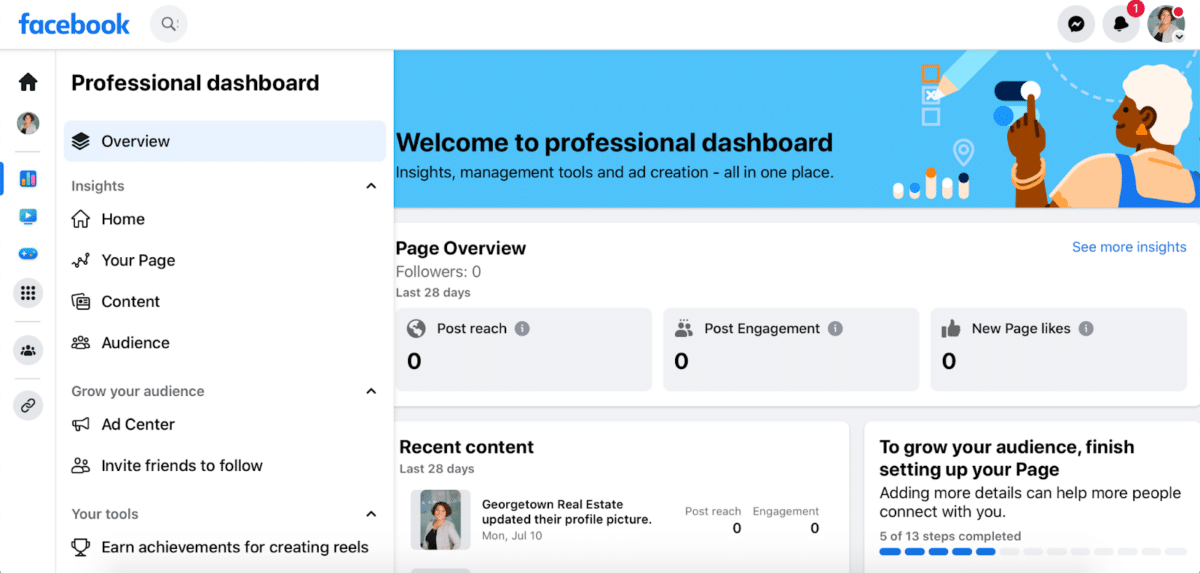
As you play around with the insights tool, you’ll notice that it tracks all of the different ways that your audience engages with your page.
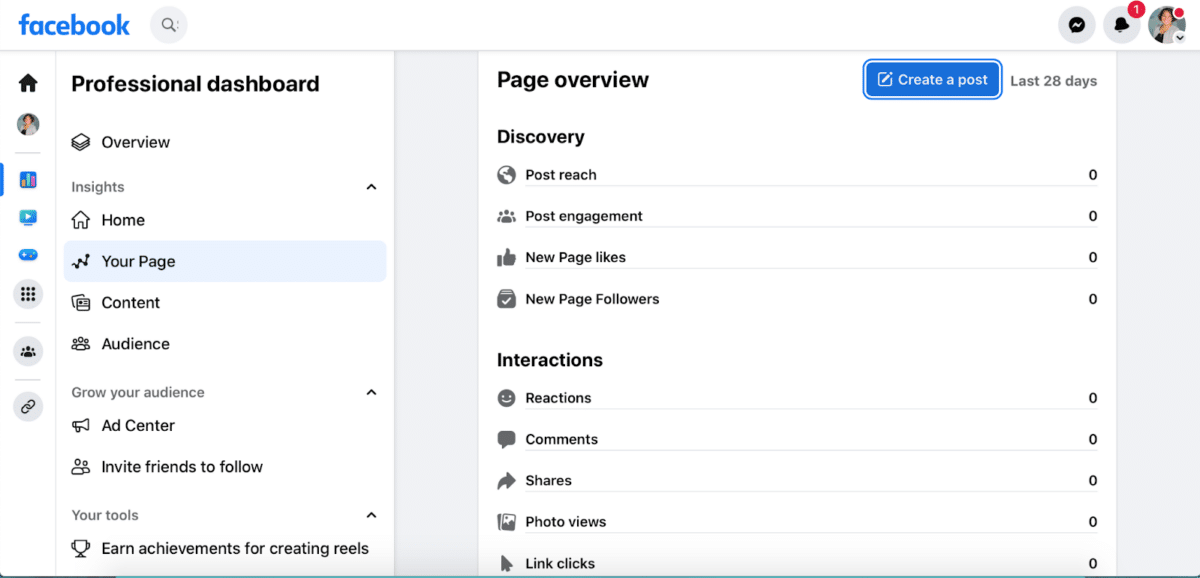
As you try out new ways to engage with your audience, make sure you’re tracking your progress here. Not only does it help you see what works and what makes your audience tick, it’s also satisfying and motivating to see those numbers climb over time.
11. Congratulations!
🎉 You did it! 🎉 Go get yourself a cookie.
But don’t forget that—while you have a bright, shiny new real estate agent Facebook page—you still have work to do. You’ll need to actually use it to engage with your audience and advertise your services. So post a ton, try out ads, and watch closely to figure out what works and what doesn’t. Most of all, be creative and have a little fun!
Bonus Tip: Conduct a Branding Audit
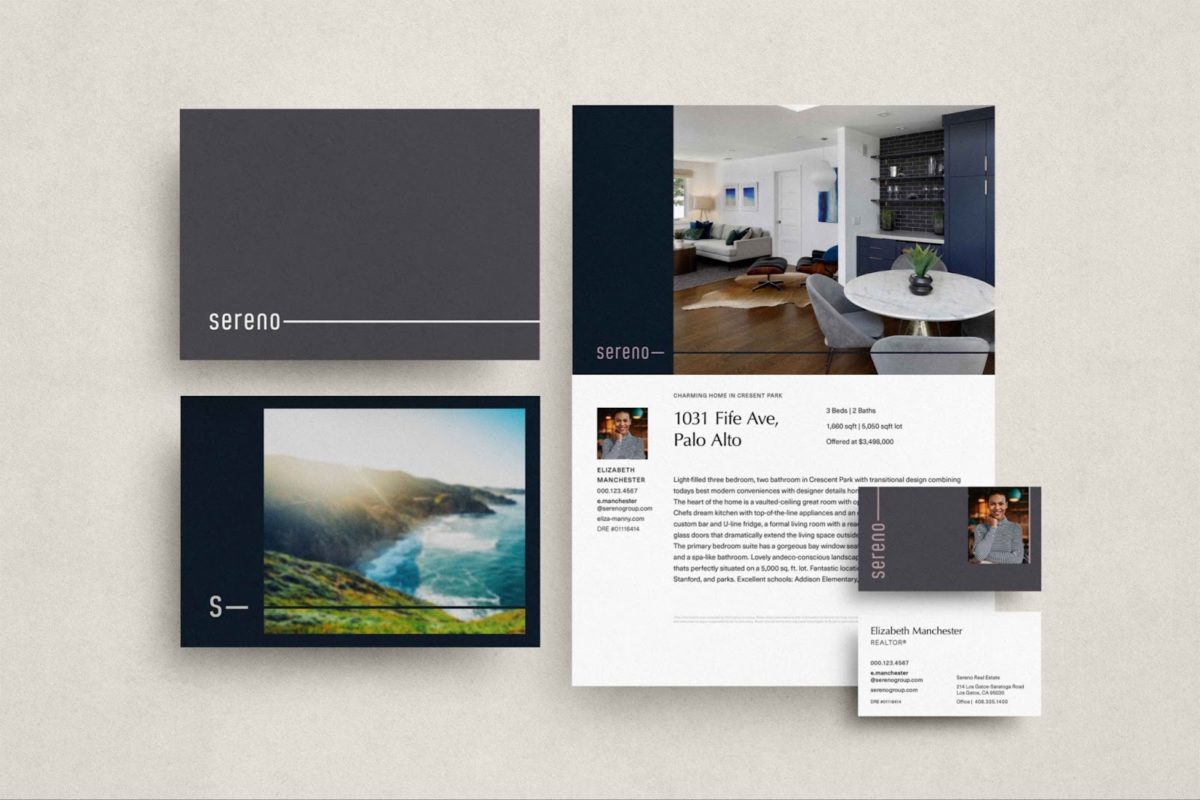
Before you start any social media marketing campaign for your real estate business, your first step should always be to assess your personal branding honestly and thoroughly.
I know what you’re thinking: You put a lot of work (and maybe money) into your branding already, so chances are everything’s hunky-dory, right? Well, keep in mind that overestimating the quality of work you’ve put time, money, and effort into is so common that behavioral economists have a name for it: The sunk cost fallacy.
Don’t worry―we’re not suggesting you spend millions on rebranding. To get started, here are a few things you should assess:
Your Headshot
Is your headshot working? Does it make you look trustworthy, confident, and competent? How’s the lighting? Is it blurry or out of focus? Are you dressed professionally enough? How about your smile? Is it genuine or forced?
13 Tips for Creative Real Estate Headshots (+ Examples)
Your Logo
While agents don’t necessarily need a logo, having one can give you that little push over the edge that might help a homeowner decide to send you a message on your Facebook page.
The 16 Best Real Estate Logos of 2024
Your Slogan, Tagline & Marketing Copy
Like logos, a slogan and tagline are nice to have, but not absolutely necessary for most agents. However, you should be aware that a slogan is more advertising-focused and designed to sell you and your brand, whereas a tagline is more public relations-focused, indicating the promise of your brand.
At the very least, you should craft some copy that describes your unique value for your clients. If you don’t, no sweat. You can work on it as you build out your Facebook page.
93 Best Real Estate Slogans & Taglines
Revisiting Your Mission, Vision & Values
They say the best time to plant a tree was 20 years ago, and the second-best time is today. This is especially true when it comes to your business. That’s why there is no bad time to sit down and revisit your mission, vision, and values. After all, this is the core identity of your brand.
Knowing what difference you want to make in your community (your mission), where you see yourself in 10 years (your vision), and what matters most to you (your values) will greatly increase the likelihood that your brand will resonate with people in your community, and lead to them hire you.
Craft an Inspiring Real Estate Mission Statement
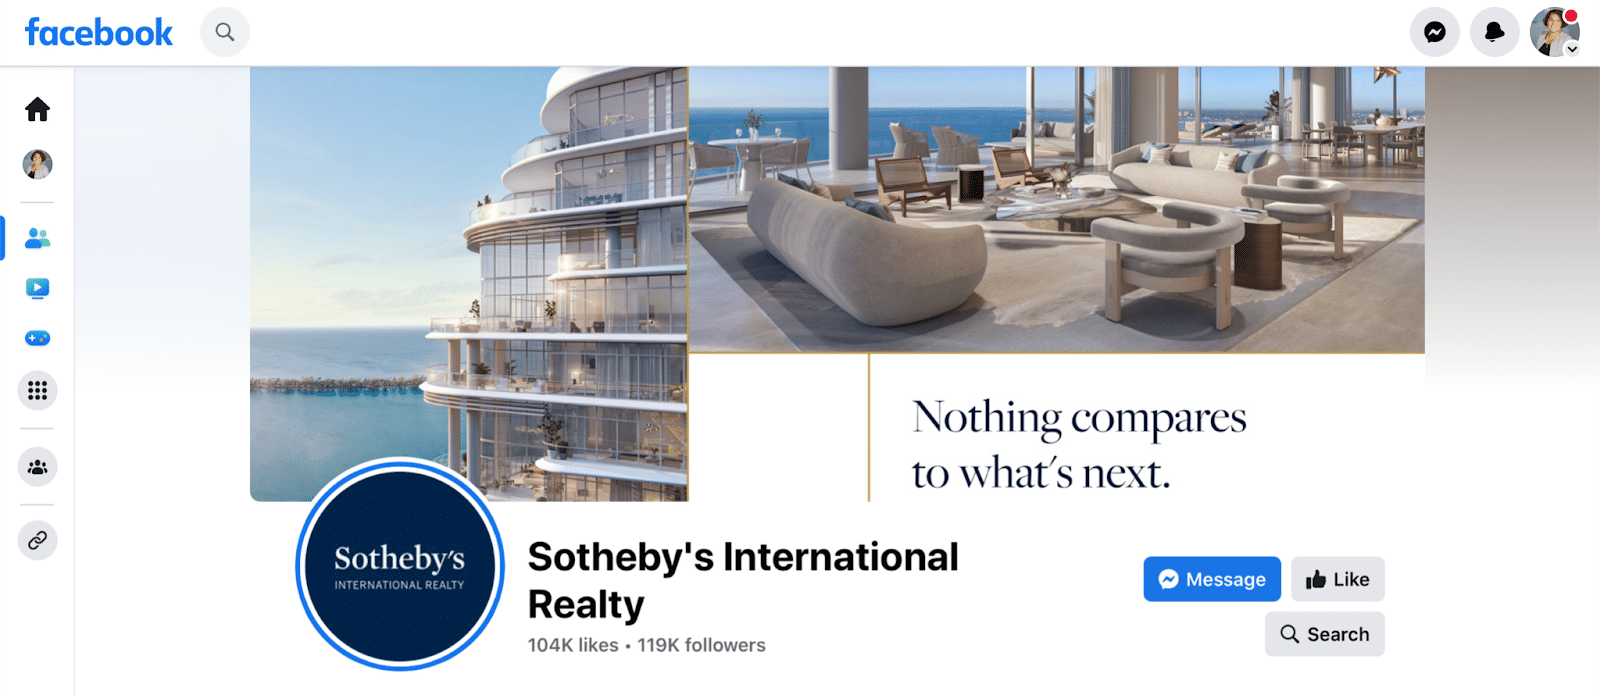
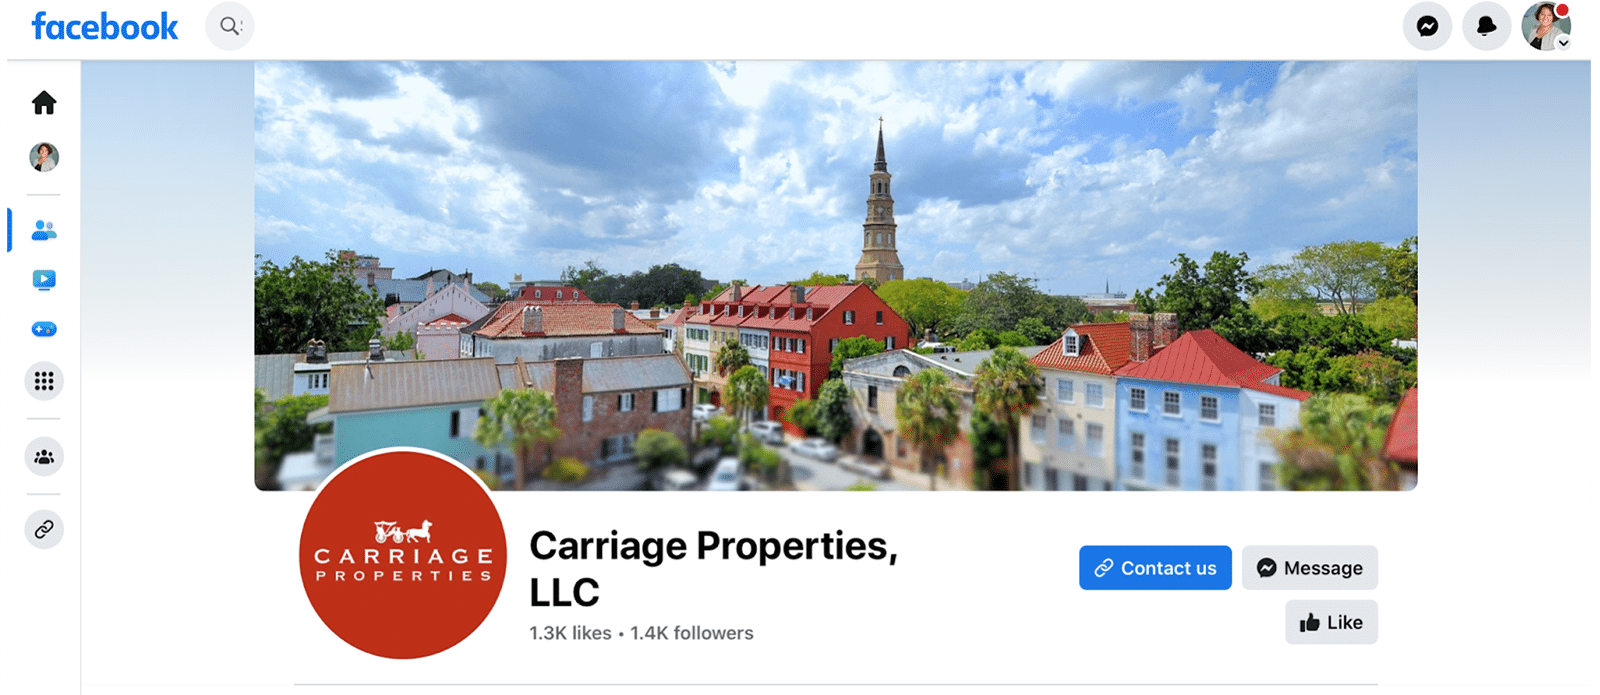
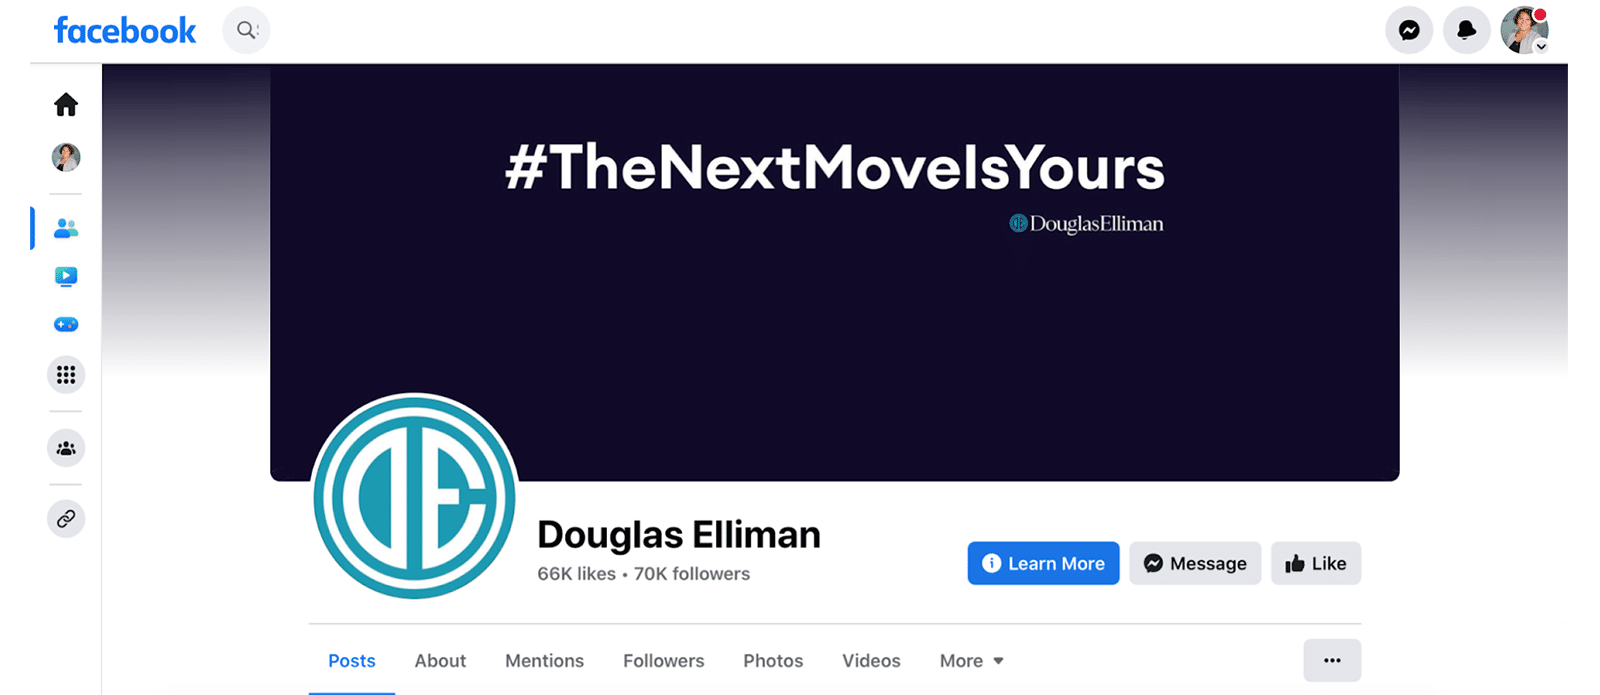
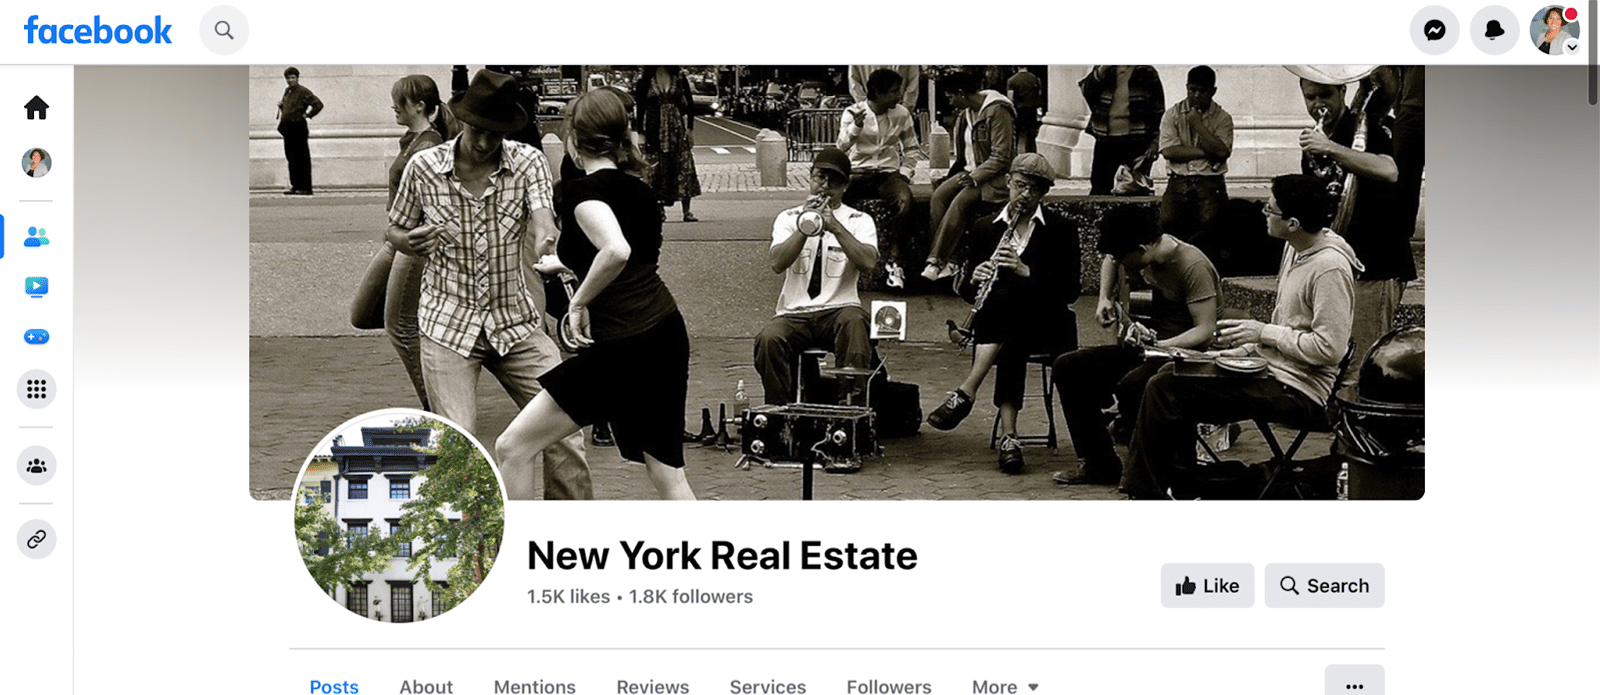
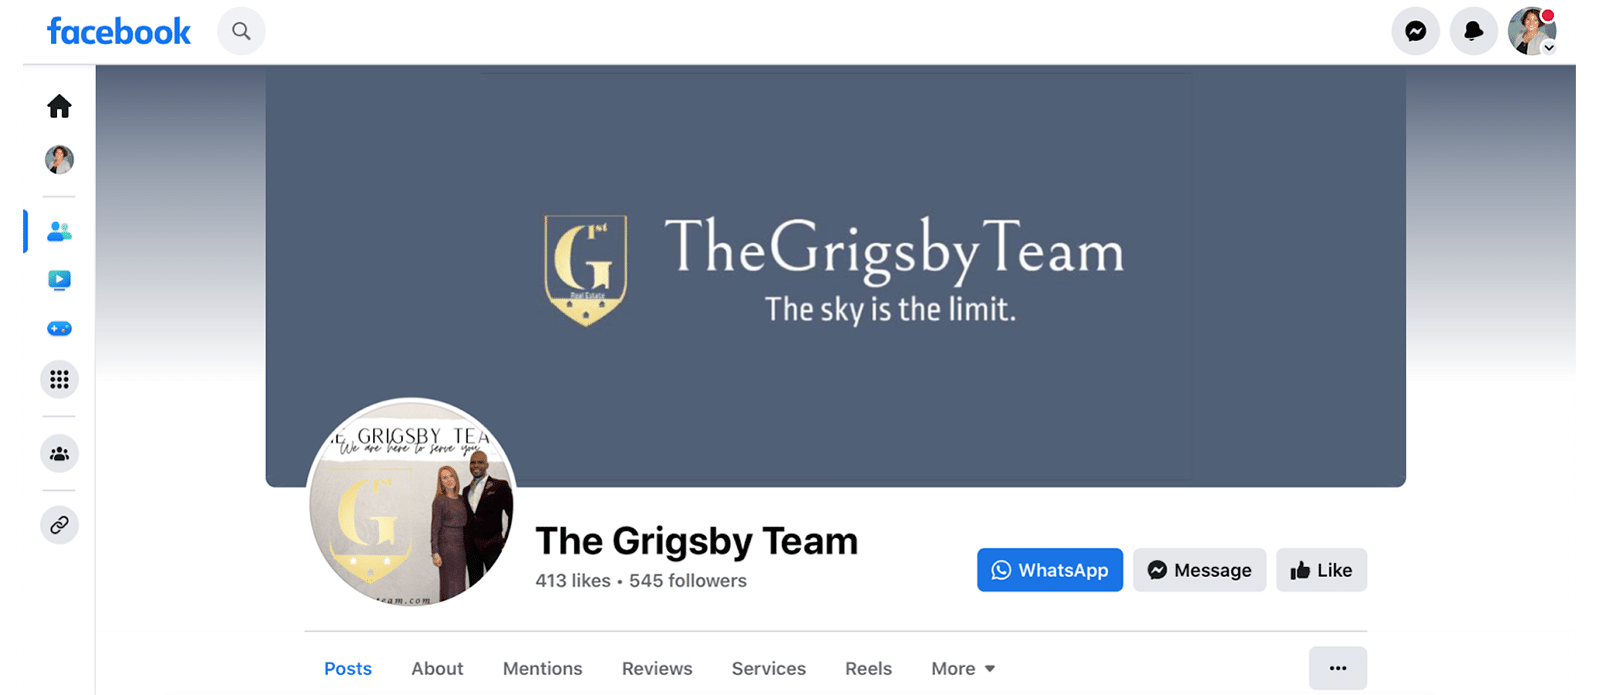
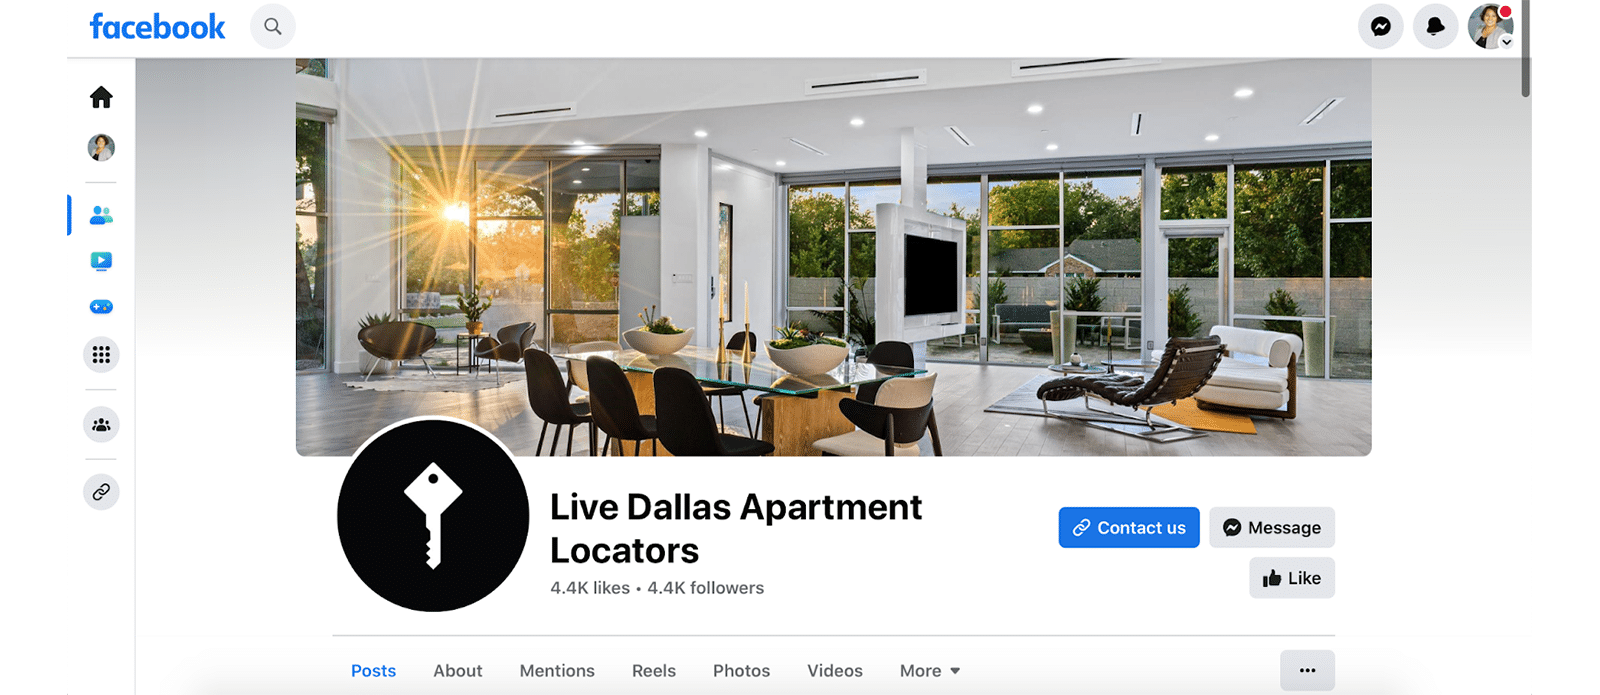
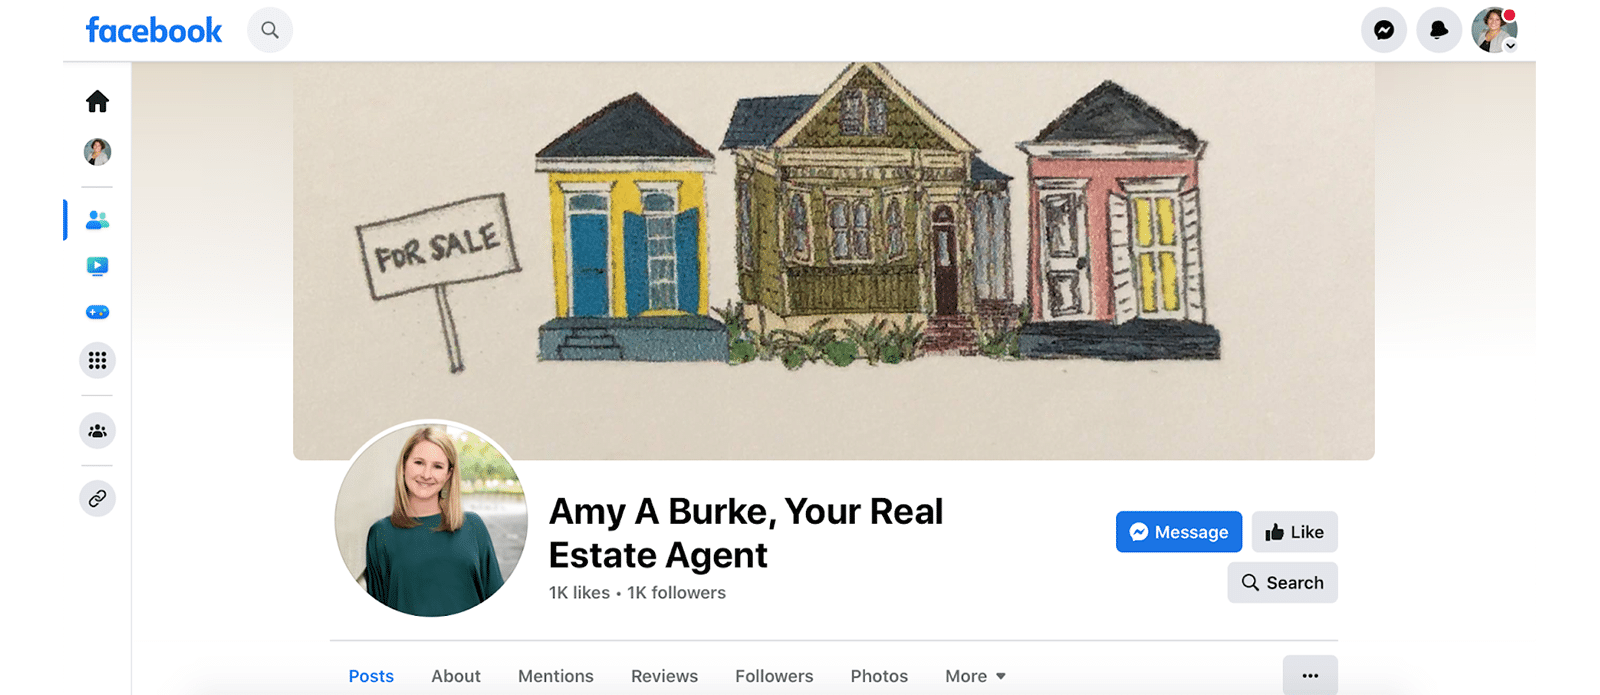
Examples of Real Estate Agent Facebook Pages We Love:
Bringing It All Together
Setting up a real estate agent Facebook page might be one of the most impactful lead generation and marketing projects you can undertake. Once you have a basic page set up, you can start promoting open houses via promoted posts and start placing laser-targeted ads to generate buyer and seller leads.
Have experience building a page? Have tips for using Meta? Want to show off a page you’ve created? Let us know in the comments!
The Close’s rock star marketing director, Kaydi Rainey, contributed to this article.


